Monday, February 23, 2015

Maggie Monday-Newborn Photos

Here is installment 2 in the series of Maggie photography sessions. 

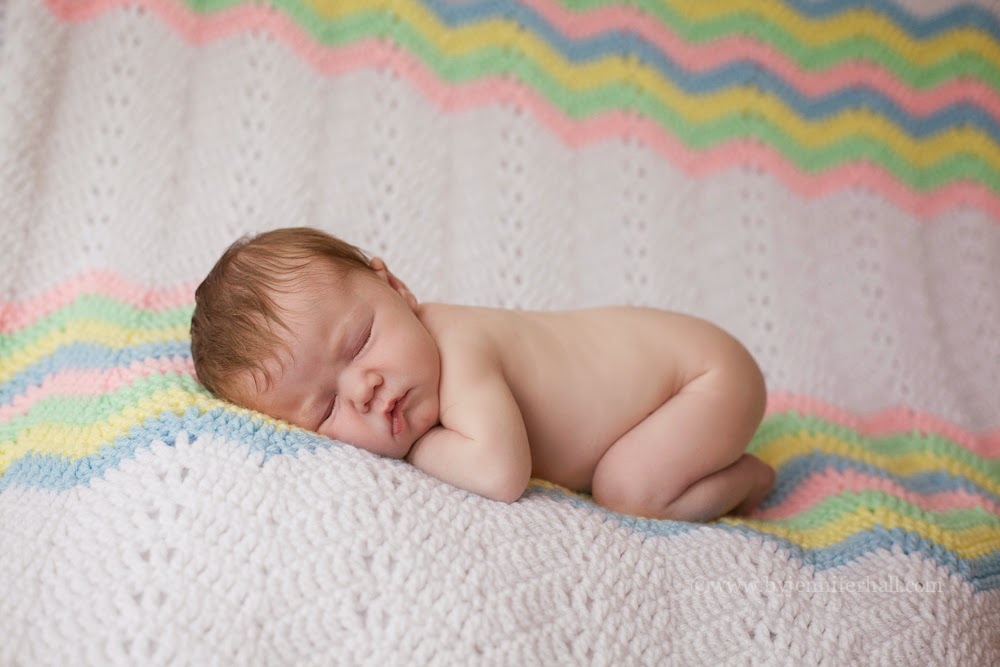
25 days after my maternity photo shoot (see that post here), Maggie decided to make her entrance. Love at first sight doesn't even begin to cover it! (You moms know what I'm talkin' about.)

Our newborn photo shoot was then scheduled. Again, shot by the fantastic Jennifer Hall, in her home studio. Check out her portfolio here.

 How cute were those squishy newborn photos going to be?!? Well, you be the judge...here are four of my favourites. 

Wise Winnie

Grumpy sleeper!

A kiss from Goober

My grandmother crocheted the blanket

And really the only reason I had maternity photos taken, was to get this before and after photo. I first saw this kind of photo in a People magazine article when P!nk was introducing her first daughter. I knew that when I had a baby, I wanted the same thing. Jenn did not disappoint.

Look at the love!

Thanks for indulging my over-share!

More to come,


Thursday, February 19, 2015

Cutting, Cutting, Cutting...

Huge exciting night at my house last night! Maggie went down when we got home from book club and I went downstairs to finish cutting for the Elephant Parade blocks. I am behind on this quilt along, but persevering nonetheless. 

Last week, I tackled cutting up the off-white fabric I purchased from my LQS. It is a Northcott ColorWorks Premium Solid, but I'm not sure what colour number it is. Looking from the swatches on the website, it may be a 9000-11 or 9000-14. I'll find out the next time I'm there...if I remember to bring a swatch to match.

All done! Er...not quite.

Here's how I label...I think I need smaller stickies!
One HUGE mistake I made was not labelling the strips early enough. I started hacking cross-cutting my sashing strips into block pieces and got through 3 sashing strips before I realized it. OOPS! I have a little bit of off-white yardage left, so I think I'll cut new sashing strips and grab some more yardage if I need it. Would you buy and/or cut new strips? Or use the cut ones?

Needless to say, I was very careful when cutting the colour fabric last night. It took me about 3 hours to cut the remaining fabrics. Here is the result.


Can you see the blocks aching to be put together?

So glad that's done. Now I can get to putting blocks together, and perhaps get a little caught up to the quilt along. This week is week 3, which is an adorable frog. Check out the instructions at Sew Fresh Quilts. I'll post updates as I muddle my way through.

More to come,


Monday, February 16, 2015

Maggie Monday

I never thought I would say this, but: My photographer is Jennifer Hall. (I mean, who has a photographer?) I must be so fancy!  :)

I started having pictures taken by Jenn when I was pregnant. In these photos, I am 4 weeks away from Maggie making her entrance. I was swollen and felt huge, but Jenn found a way to find the beauty.

Maternity pics:


Love this quote!

Me and my mom


More to come,


Friday, February 13, 2015

Elephant Parade Quilt Along

Elephant Parade Quilt Along
When I was getting caught up on my Bloglovin' feed (it gets out of control so quickly!!), I came across this post on Sew Fresh Quilts. I love me some elephants, so when I saw her final design, I was swooning!  Here it is:


Elephant Parade by Sew Fresh Quilts
Isn't it adorable? I knew that I had to give it a shot.

I took the fabric list to my LQS and got to shoppin'. Here's what I decided on and purchased:


The original design calls for solids, but I decided to go with some subtle patterned fabric for everything except the sashing. The grey fabrics have some sparkle, as well.

As the quilt along is going onto its 3rd week (posts on Sundays), I am a little bit behind, but I am getting some sewing done when Maggie is sleeping, so hopefully I'll catch up at some point.

More to come,


Wednesday, February 11, 2015

Mustang Race

Look at what I found at my LQS! Beautiful Cotton + Steel fabrics in Mustang. Michelle also had a little grab bag of threads that just happened to match, so I had to grab one, of course. Thank you, Simcoe Sew & Quilt


I went in looking for a jelly roll. I had watched a Missouri Star Quilt Co. tutorial on YouTube the night before, and thought that it might be my best chance of getting a quilt top finished!  :) This is the tutorial I watched: Jelly Roll Race!

I didn't have a recipient in mind for this quilt, because I wasn't quite sure what I was going to find at the store. When I found the new Cotton + Steel lines, I targeted a quilt for a little girl who is due at the beginning of March.


The video says that the quilt top will come together in 45 minutes to an hour.  This was not so true for me, but I think that I am on the slow side.  In total, it took me 2 hours to put this quilt top together, 3 separate times while Maggie slept . I am pretty happy with that, and I feel like I accomplished something.


Sewing strips together

Strippy goodness

A quick run down of how to jelly roll race:
1. Unroll the jelly roll and sew the strips to each other consecutively so it forms one big strip, with right sides together.  (The tutorial shows a diagonal join, but I'm not so good at those, so I joined them with a straight seam.)
2. When the long strip is done, fold it on itself so the ends are together and sew down the long side. When you get to the end, cut the loop open and you have a 2 row strip that is half the size of the original strip.
3. Keep folding the strip on itself until you get to 32 rows (5 times).
There, you are done! Easy peasy, grilled cheesy.

Here is what mine looked like:


I didn't like the big chunk of aqua that was plunked in the middle. So, I unstitched between the middle of the aqua, and sewed the two pieces back together with the aqua separated.  This is what it looks like now:


A little better, but to be honest, I'm not loving it. I'm not sure what I am going to put on the back, but I'm thinking either pink or aqua minky.  Off to the fabric store to see what they have.

More to come,


P.S. I've linked up with Sew Fresh Quilt for Let's Bee Social...first link up ever!!


Wednesday, February 04, 2015

It's Elementary Soft Book


Last night I dusted of the sewing machine and revved it up! I had done some sewing for Christmas gifts, but as I was sewing last minute, I had no time to take pictures, let alone write a blog post. Someday I will catch you up on what I made.

I bought this soft book panel at Sew What?, a lovely quilt shop in Buffalo, NY, when I went on a shopping trip with friends in December 2013.  I was 6 months pregnant at the time, and having strong nesting feelings at the time. I bought a whole bunch of fabrics, most of which still need to be used in some way.


It's Elementary soft book panel by South Seas Imports

It was so cute, I couldn't resist buying 2. And they sat and and sat and sat. I even took them to my mom's place when I moved there just before I had the baby and for 2 months after. And they sat there, too. 

My nephew is going to be 1 year old on the 25th. It is hard to believe that the year has gone by so quickly! I mentioned Lucas in this post. (I am also planning on completing The Quiet Book.) My own baby girl is now 10 months old.  10 months! Since my sister-in-law is planning Lucas' birthday party, I figured I should finally put this together.

I was a little nervous about this project. I have used my machine for piecing and for sewing clothes, but never with a layered quilty project like this. I read the instruction panel and a bit of it didn't really make sense, but I figured if I just started, it would straighten itself out by the time I got there.

First step was to cut out the book panes on the dotted line. There was a note about leaving 1/4 inch for the seam allowance, but that is already included in the dotted line space. That was confusion #1.


2 panels cut out

Next, I layered the listed pages with right sides together, then placed them on a piece of quilt batting.
Pages layered with batting
All lined up and ready for pins


The batting I was using was iron-on, so for the first couple of pages, I used the iron. I found that the batting would stick to the ironing board, then to the cloth I used, so I decided to skip the iron and just pin the panels and the batting together.


All pinned up and ready to sew!
Next, I sewed around the outside. There was a white line on the front of the panel that I could see through on the back, so I sewed just to the outside of that line. 


On my first page, I left a 3 inch gap so it could be turned inside out...I learned my lesson! On the remaining pages I left 4-5 inches open to make turning easier.


The seam
The gap - needs to be larger!
The edges need to be trimmed to reduce the bulk near the seams when the pages are turned right side out. Also, the corners nipped off so the corner is a pointy as possible.  Here, I learned an important lesson...in order to hand sew the gap after turning, you need to leave more fabric at the gap...in other words don't trim the fabric off. The batting at the gap, however, should be trimmed lower than the seam, so that it does not get in the way when closing the gap by hand.

Trim...


...nip off the corners...
...and turn.


I closed the gap by hand sewing, using a blind stitch (I think).

For Maggie's book I decided to top stitch around each box on the page. It turned out a little wonky, so I skipped that on Lucas' book.

Last, the pages were stacked together in the correct order and I sewed the all together down the centre.


TA DA!


All in all, it took me about 1.5 hours to put both of these books together. I am quite happy with how they turned out. An easy project, made with love. I would definitely buy another soft book panel.

More to come,


Monday, February 02, 2015

5 Things I Couldn't Live Without in January

I know, I know. It's been waaay too long since my last post. Miss Maggie is 10 months old (when did THAT happen?) now and the last time I posted, I was had modified a pair of baby sunglasses for our trip to Kelowna...in AUGUST!  Sorry.

The inspiration for this post is a recent post from GnomeAngel.  Read her post here.

So, here are the 5 things I couldn't live without this past January.

1.  Black leather mitts
It has been cold this month. I mean, it's January in Ontario, of course it is cold. Without a doubt, my black leather mitts have helped me keep warm.  Nice soft leather on the outside, toasty polar fleece on the inside. Quick to warm up my fingers, even if I left them in the car overnight.

2.  Bath time
My little one LOVES the bath. Without fail, putting Maggie into a nice warm tub of water brings out her smiles and giggles. Splashing and chasing toys around the tub are common sights. This time of day makes me thankful that I am a mum.
Bath time! Happy baby!

3. Calendar app
I have been leaning on this app all month. I am not able to remember events in the same way as when I was younger. Pile on pregnancy brain, followed by baby brain  (these are real afflictions, people!) and I will not be anywhere unless it is in my calendar.

4. My photographer
Who knew that one day I would be able to say that I have a preferred photographer? I am so glad that I found Photography & Design by Jennifer Hall. She takes fantastic photos. Below are a sample of the pics I have from my maternity, newborn and 6 month photo shoots. We just did a Valentine's Day mini shoot, as well. LOVE, LOVE, LOVE!!

5. Nap time
This one is a no brainer! Maggie has been teething so there are days when she is whiney and clingy and I can't get anything done. On one hand, I try to treasure these times because soon enough she won't want anything to do with me. But, on the other, nap time gives me a well deserved break.

I'm hoping that this is the start of a blogging renewal. Thanks for the inspiration, GnomeAngel!

More to come,